I'm so excited to share the process of ice dyeing! So, ice dyeing - basically the coolest technique for dyeing clothing, think: tie dyeing's cooler sibling. The dye gets sprinkled on top of the ice, so when it melt it distributes the colors to make beautiful awesomeness. It's a really cheap and easy activity, especially if you use old or thrifted clothing. The best part is that ice dying doesn't need to be a summer activity. You can get the same effect using snow!
What you will need:
White clothing
Soda ash
Powdered dye in various colors
Bucket
Ice (or snow)
Some type of rack (I used an oven rack)
Vessel for catching the dye/water runoff
Optional: Textile Detergent
The dye and soda ash can be obtained from most craft stores, I got mine at AC Moore. The soda ash is important to get because it keeps the colors from running. As far as the dye, feel free to go with as many or as few colors as you want! I was going for a cooler palette, so I chose lots of blues and greens.
First off, prepare your water/soda ash mixture. Ratio should be one gallon of warm water to one cup of soda ash. For four shirts, a dress and a pair of long johns I used two gallons of water and two cups of soda ash. Let that soak for around 15 minutes.
While that's sitting (or maybe before depending on your organization level), you want to get basically any rack (cooling rack, oven rack, etc.) and put it on top of the vessel that you want the water from the melted ice and the dye to fall into. I don't know if the dye will stain the vessel, but just in case you probably want to use something you don't really care about. Take the clothing out of the soda ash solution and ring it out. It's alright if it's still damp, just not soaking. Pile the clothes onto the rack.
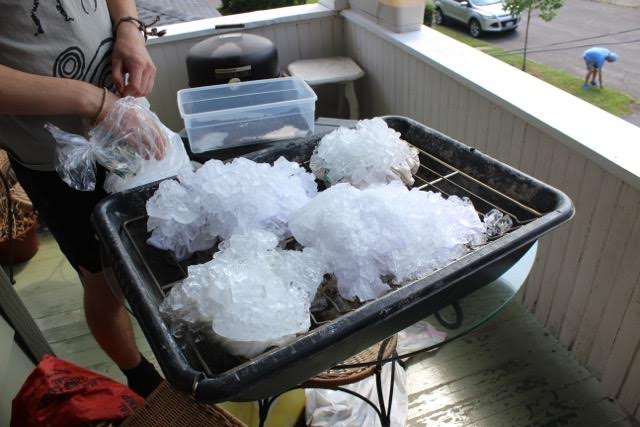
Next, pile on the ice! Since we used an oven rack with wide openings, we had to be extra cautious about placing the ice. Make sure you pile up the ice and cover the entirety of the clothing. When buying ice, go with more - it uses more ice than you think. In total we ended up using about two and half bags.
Next, sprinkle on the dye. Since we had packets of dye, we just cut the corners and sprinkled directly from those. Alternately, you can use a plastic spoon to dole out the colors or anything that will ensure an even layer of distribution. We didn't really have a strategy for how we added the colors, mostly just trading different colors back and forth. Once you have entirely covered the ice, leave it alone to do it's thing. As tempting as it is to want to pick up the clothes after the ice has melted, leave em alone for 24 hours.
I had to leave before the process was over, so I don't have pictures for the end of the process, it's pretty straight forward though (if you've tie dyed before, it's the same process). After 24 hours, rinse the clothes in cold water until the water runs clear. Throw the clothes in the washing machine on the hot setting. Tutorials I read recommend using Textile Detergent when washing them. We didn't use it, but it will help colors set. The end result was better than I imagined. You can see the finished product here!


Had NEVER heard of ice dyeing before but it looks EPIC! I so, so want to try it now! Haha
ReplyDeleteRaashi
raashiagarwal.blogspot.com.au
Must try *_*
ReplyDeleteThe Cutielicious
http://www.thecutielicious.com
Federica
Haven't heard of ice dying before but love the end result!
ReplyDeletethriftylilpixie.com
Oooh I saw I DIY on Pinterest for this the other day, I really wanna try it! Great post lovely, I'd love to see how the clothes turned out!
ReplyDeleteHelen xx
Hels Yeah | Fashion & Lifestyle